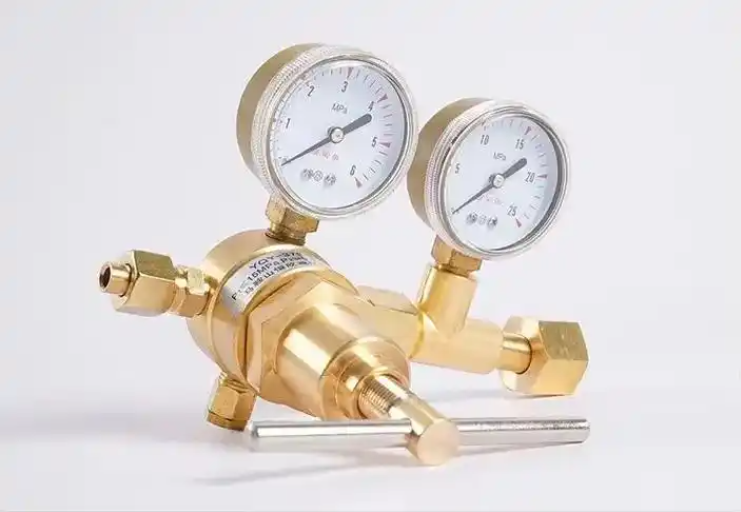
A pressure reducing valve is a valve that reduces the inlet pressure to a desired outlet pressure by throttling the valve disc, and can use the energy of the medium itself to keep the outlet pressure basically unchanged when the inlet pressure and flow rate change.
Depending on the type of valve, the outlet pressure is determined by the pressure adjustment setting on the valve or an external sensor. Pressure reducing valves are commonly used in residential, commercial, institutional and industrial applications.

I. Pressure reducing valve inspection – appearance quality inspection requirements
1. Pressure reducing valve surface quality inspection:
The pressure reducing valve shall not have defects such as cracks, cold shuts, sand holes, pores, slag holes, shrinkage and oxidation inclusions.
The valve surface quality inspection mainly includes inspections of surface gloss, flatness, burrs, scratches, oxide layers, etc., which need to be carried out in a well-lit environment and use professional surface inspection tools.
The non-machined surface of the pressure reducing valve should be smooth and flat, the casting mark should be clear, and the pouring and riser should be flush with the casting surface after cleaning.
2. Pressure reducing valve size and weight inspection
The size of the valve has a direct impact on the opening and closing performance and sealing performance of the valve. Therefore, in the appearance inspection of the valve, the size of the valve needs to be strictly inspected.
The size inspection mainly includes inspections of valve diameter, length, height, width, etc. The size and weight deviation of the pressure reducing valve should comply with the regulations or the drawings or models provided by the demander.
3. Pressure reducing valve identification inspection
The appearance inspection of the pressure reducing valve requires the inspection of the valve identification, which is required to meet the requirements of the valve product standards, and the identification characters are clear and not easy to fall off. The pressure reducing valve identification inspection should include the valve body material, nominal pressure, nominal size, smelting furnace number, flow direction, and trademark on the valve body; the nameplate should include the applicable medium, inlet pressure range, outlet pressure range, manufacturer name, model specification, and factory date.
4. Pressure reducing valve box mark and color box packaging inspection
The pressure reducing valve needs to be packaged before leaving the factory to protect the valve from damage during transportation and storage. The appearance inspection of the pressure reducing valve requires the inspection of the box mark and color box packaging of the valve.
II. Pressure reducing valve inspection – performance inspection requirements
1. Pressure reducing valve pressure regulating performance inspection
Within the given pressure regulating range, the outlet pressure should be able to be adjusted continuously between the maximum and minimum values, without blocking and abnormal vibration
2. Pressure reducing valve flow characteristic inspection
When the outlet flow changes, the pressure reducing valve shall not have abnormal action, and its outlet pressure negative deviation value: for direct-acting pressure reducing valves, it shall not be greater than 20% of the outlet pressure; for pilot-operated pressure reducing valves, it shall not be greater than 10% of the outlet pressure
3. Pressure reducing valve pressure characteristic inspection
When the inlet pressure changes, the pressure reducing valve shall not have abnormal vibration, and its outlet pressure deviation value: for direct-acting pressure reducing valves, it shall not be greater than 10% of the outlet pressure; for pilot-operated pressure reducing valves, it shall not be greater than 5% of the outlet pressure.
4. Pressure reducing valve sealing performance inspection
-For elastic sealing structures, the leakage shall be as specified in Table 1. For metal-metal sealing structures, the allowable leakage shall not exceed 0.5% of the maximum flow.

-The elastic seal of the outlet pressure gauge should be zero metal-to-metal seal and not exceed 0.2MPa/min.
5. Continuous operation capability
After the continuous operation test, it can still meet the requirements of pressure regulation performance and flow rate.
Post time: Dec-19-2024


